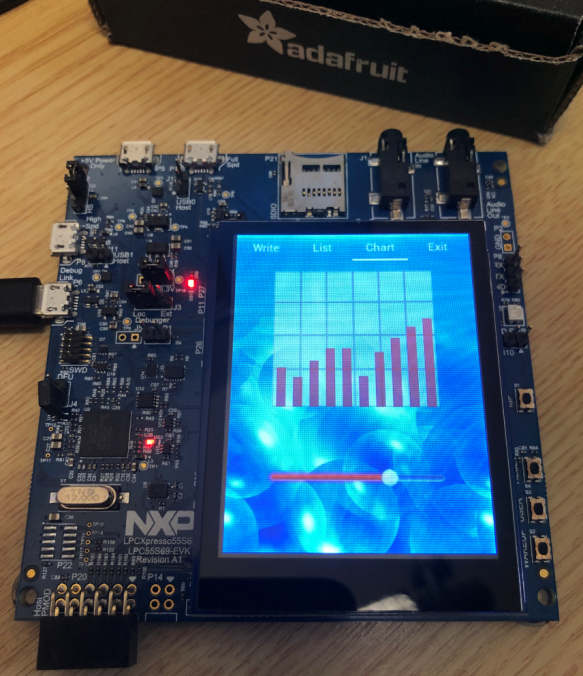
恩智浦LPC55S69-EVK是一款多功能板。在本文中,我们将演示如何将其与 Adafruit TFT LCD 板配合使用,同时具有电阻和电容式触摸。对于软件,我使用开源的LittlevGL GUI。
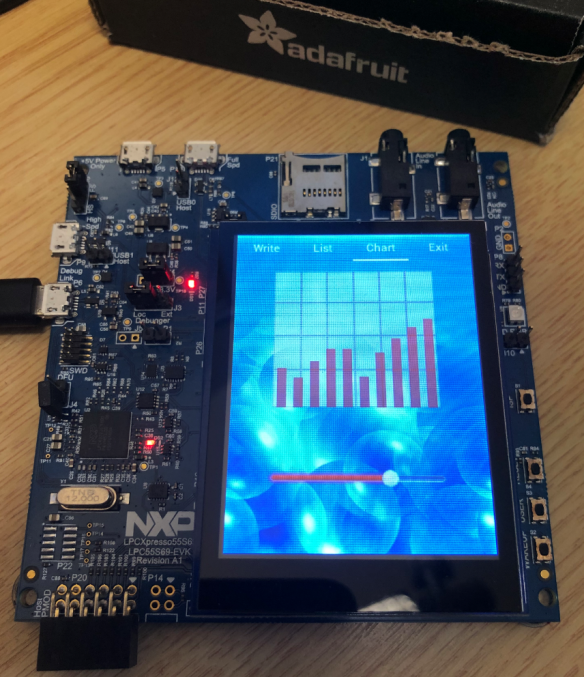
使用的软件和硬件
- 恩智浦MCUXpresso IDE V11.0.1,带恩智浦MCUXpresso SDK V2.6.2
- LPCXpresso55S69 板 (LPC55S69-EVK)
- Adafruit 2.8″ TFT 触摸护罩,适用于 Arduino,带电容式触摸屏:https://www.adafruit.com/product/1947(推荐)
- 或: Adafruit 2.8″ TFT 触摸护罩,适用于 Arduino,带电阻式触摸屏:https://www.adafruit.com/product/1651
- LittlevGL(开源GUI库) V6.0.2: https://littlevgl.com/
- McuOnEclipse 库 V1.0.2: https://github.com/ErichStyger/McuOnEclipseLibrary与 FreeRTOS V10.2.1
wordpress.com/2019/11/installed-sdk.png?w=584″ data-medium-file=”https://mcuoneclipse.files.wordpress.com/2019/11/installed-sdk.png?w=300″ data-orig-file=”https://mcuoneclipse.files.wordpress.com/2019/11/installed-sdk.png” data-orig-size=”1064,378″ data-permalink=”https://mcuoneclipse.com/2019/11/17/open-source-littlevgl-gui-library-on-adafruit-touch-lcds-with-nxp-lpc55s69-evk/installed-sdk-2/” height=”207″ sizes=”(max-width: 584px) 100vw, 584px” src=”http://www.cheeli.com.cn/wp-content/uploads/2019/12/installed-sdk.png” srcset=”https://mcuoneclipse.files.wordpress.com/2019/11/installed-sdk.png?w=584&h=207 584w, https://mcuoneclipse.files.wordpress.com/2019/11/installed-sdk.png?w=150&h=53 150w, https://mcuoneclipse.files.wordpress.com/2019/11/installed-sdk.png?w=300&h=107 300w, https://mcuoneclipse.files.wordpress.com/2019/11/installed-sdk.png?w=768&h=273 768w, https://mcuoneclipse.files.wordpress.com/2019/11/installed-sdk.png?w=1024&h=364 1024w, https://mcuoneclipse.files.wordpress.com/2019/11/installed-sdk.png 1064w” width=”584″/>
GitHub 上提供了一个带有所有文件的示例项目(请参阅本文末尾的链接部分)。该软件配置为使用电容式或电阻式触摸显示屏。我建议使用电容式触摸版本,因为触摸更加精确,无需手动校准。
硬件
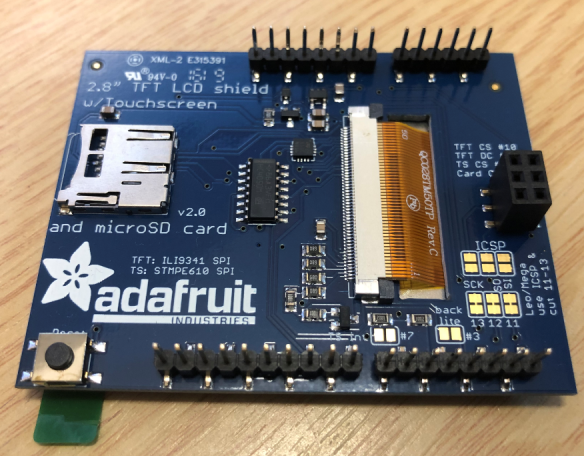
电容式和电阻式 Adafruit LCD 板均使用流行的 ILI9341 显示控制器。在电阻版本上,使用 STMPE610 (SPI) 触摸控制器。在电容式版本上,存在 FT6206 (I2C)。
Adafruit 板背面有一个微型 SD 卡插槽:
要将板与 LPC55S69-EVK 配合使用,SPI 总线的跳线 11、12 和 13 必须用焊料封闭,右侧的三个跳线痕迹必须用锋利的刀切割:
wordpress.com/2019/07/changed-jumper-settings.png?w=584″数据介质文件\”https://mcuoneclipse.files.wordpress.com/2019/07/更改跳线设置.png?w=300″数据-orig-file-file=”https://mcuoneclipse.file.file.com/2019/07/更改跳线-设置。 677,495″ 数据-permalink=”https://mcuoneclipse.com/2019/11/17/开源-小伏尔-吉库-在阿达果-触摸-lcds-与nxp-lpc55s69-evk/更改跳线-设置/”高度=”427″大小*”最大宽度:584px) 100vw, 584px”src=”http://www.cheeli.com.cn/wp-内容/上传/2019/12/更改跳线-设置.png”srcset=”https://mcuoneclipse.file.com/2019/07/更改-跳转设置.png?w_584_527 584w,https://mcuoneclipse.files.wordpress.com/2019/07/changed-jumper-settings.png?w=150&h=110 https://mcuoneclipse.files.wordpress.com/2019/07/changed-jumper-settings.png?w=300&h=219 300w,https://mcuoneclipse.files.wordpress.com/2019/07/changed-jumper-settings.png 677w”宽度=”584″/*
对于模拟触摸显示版本,无需修改硬件。
为了使用逻辑分析仪验证信号,软件的第一个版本已开发为”自由线”连接:
wordpress.com/2019/07/first-gui-elements.png?w=584″数据介质文件\”https://mcuoneclipse.file.word.wordpress.com/2019/07/第一gui元素.png?w=300″数据-orig-file=”https://mcuoneclipse.file.file.com/2019/07/first-gui-元素.png”数据-字-大小 82″ 数据permalink=”https://mcuoneclipse.com/2019/11/17/开源-小伏尔-吉-库-在阿达达果-触摸-lcds-与恩智浦-lpc55s69-evk/第一-gui元素/”高度=”428″大小=(最大宽度:584px)100vw, 584px”src=”https://mcuoneclipse.files.wordpress.com/2019/07/第一gui元素.png?w=584&h=42 8″ srcset_”https://mcuoneclipse.files.wordpress.com/2019/07/第一gui元素.png?w=584&h=428 584w, https://mcuoneclipse.files.wordpress.com/2019/07/first-gui-elements.png?w=150&h=110150瓦 https://mcuoneclipse.files.wordpress.com/2019/07/first-gui-elements.png?w=300&h=220 300w,https://mcuoneclipse.files.wordpress.com/2019/07/first-gui-elements.png?w=768&h=563 768w,https://mcuoneclipse.files.wordpress.com/2019/07/first-gui-elements.png 794w”宽度=”584″/*
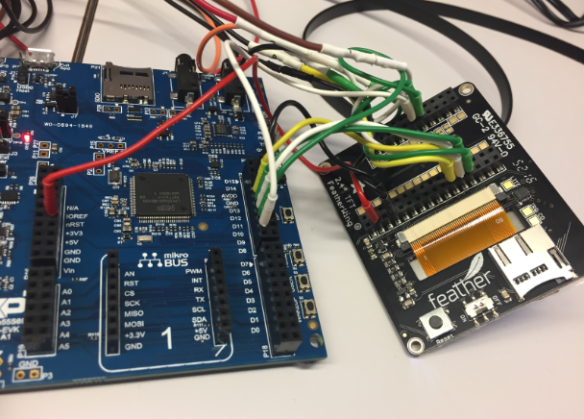
该板也可以与 Adafruit 羽毛 LCD 板一起使用:
软件
作为IDE,使用恩智浦MCUXpresso IDE。
wordpress.com/2019/11/eclipse-project.png?w=300″数据-orig-file=”https://mcuoneclipse.files.wordpress.com/2019/11/eclipse-project.png”数据-orig-size=”516,466″数据-permalink_”https://mcuoneclipse.com/2019/11/17/开源-小伏尔-吉-库-在阿达达果-触摸-lcds-与恩智浦-lpc 55s69-evk/eclipse-project/”大小=”(最大宽度:516px)100vw,516px”src=”http://www.cheeli.com.cn/wp-内容/上传/2019/12/流门项目.png”srcset=”https://mcuoneclipse.files.wordpress.com/2019/11/eclipse-project.png 516w, https://mcuoneclipse.files.wordpress.com/2019/11/eclipse-project.png?w=150 150w,https://mcuoneclipse.files.wordpress.com/2019/11/eclipse-project.png?w=300 300w”/*
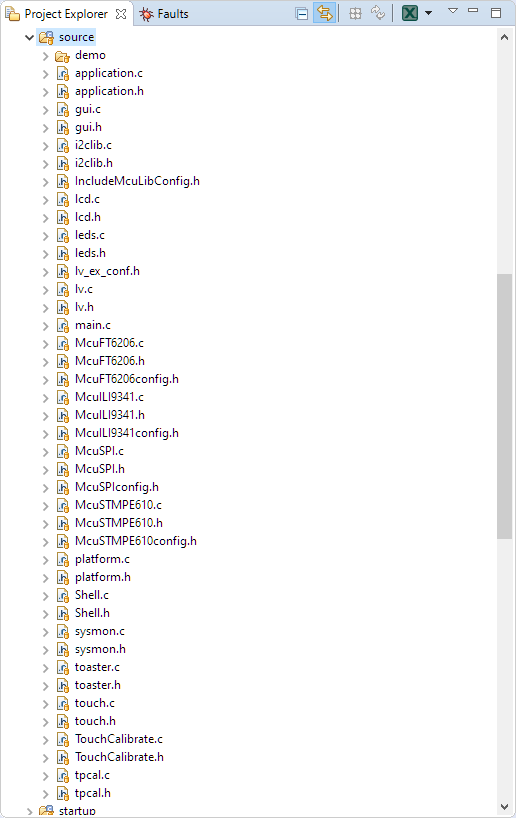
该项目包括支持电容式触摸和电阻式触摸显示:
- McuILI9341: ILI9341 LCD 控制器的驱动程序
- tpcal: 用于电阻显示的触摸点校准
- McuFT6206: 电容式触摸控制器 (I2C) 的驱动程序
- McuSTMPE610: 电阻式触摸控制器 (SPI) 的驱动器
- McuSPI: 可重入 SPI 驱动程序
- I2clib: 重入 I2C 驱动程序
- lv, gui: 小vGL GUI 和显示驱动程序
使用平台.h 中的设置,可以打开或关闭软件和驱动程序:
wordpress.com/2019/11/platform.h.png”数据-折号大小=”1026,521″数据-permalink=”https://mcuoneclipse.com/2019/11/17/开源-小伏格-gui-库-上达果-触摸-lcds-与-nxp-lpc55s69-evk/平台-h/”高度=”297″大小=”最大宽度” 584px) 100vw, 584px”src=”http://www.cheeli.com.cn/wp-内容/上传/2019/12/平台.h.png”srcset=”https://mcuoneclipse.file.file.com/2019/11/平台.h.png?w_584_amp;h_297584w https://mcuoneclipse.files.wordpress.com/2019/11/platform.h.png?w=150&h=76150w https://mcuoneclipse.files.wordpress.com/2019/11/platform.h.png?w=300&h=152300瓦, https://mcuoneclipse.files.wordpress.com/2019/11/platform.h.png?w=768&h=390 768w,https://mcuoneclipse.files.wordpress.com/2019/11/platform.h.png?w=1024&h=520 1024w,https://mcuoneclipse.files.wordpress.com/2019/11/platform.h.png 1026w”宽度=”584″/*
该项目包括一个命令行 (Shell) 接口,用于配置和检查显示器和驱动程序。默认通信方式是使用SEGGER RTT:
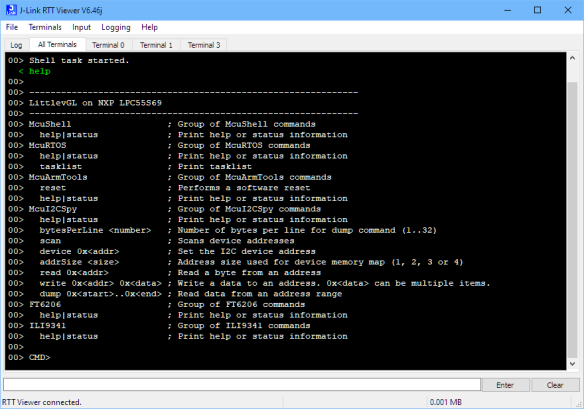
files.wordpress.com/2019/11/status-command.png?w=300″ data-orig-file=”https://mcuoneclipse.files.wordpress.com/2019/11/status-command.png” data-orig-size=”748,571″ data-permalink=”https://mcuoneclipse.com/2019/11/17/open-source-littlevgl-gui-library-on-adafruit-touch-lcds-with-nxp-lpc55s69-evk/status-command/” height=”446″ sizes=”(max-width: 584px) 100vw, 584px” src=”http://www.cheeli.com.cn/wp-content/uploads/2019/12/status-command.png” srcset=”https://mcuoneclipse.files.wordpress.com/2019/11/status-command.png?w=584&h=446 584w, https://mcuoneclipse.files.wordpress.com/2019/11/status-command.png?w=150&h=115 150w, https://mcuoneclipse.files.wordpress.com/2019/11/status-command.png?w=300&h=229 300w, https://mcuoneclipse.files.wordpress.com/2019/11/status-command.png 748w” width=”584″/>
GitHub 上的应用程序包括一些演示,包括如何使用 LittlevGL 列表小部件或屏幕键盘控件:
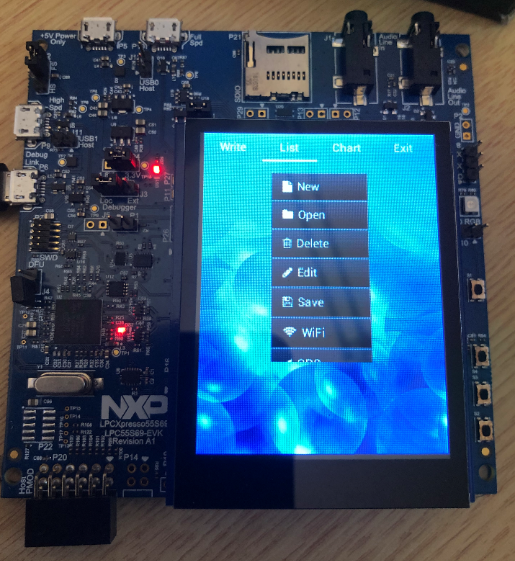
下图显示了屏幕键盘:
files.wordpress.com/2019/11/littlevgl-on-screen-keyboard.png?w=584&h=681″srcset_”https://mcuoneclipse.files.wordpress.com/2019/11/littlevgl-屏幕键盘.png?w=584&h=681 584w,https://mcuoneclipse.files.wordpress.com/2019/11/littlevgl-on-screen-keyboard.png?w=129&h=150 129w,https://mcuoneclipse.files.wordpress.com/2019/11/littlevgl-on-screen-keyboard.png?w=257&h=300 257w,https://mcuoneclipse.files.wordpress.com/2019/11/littlevgl-on-screen-keyboard.png 692w”宽度=”584″/}
总结
基于Adafruit ILI9341的触摸显示器是扩展恩智浦LPC55S69等具有最先进的开源GUI库的电路板的绝佳简便方法。这里介绍的项目支持Adafruit的电容式和电阻式触摸显示器。
小夫林快乐!
其他资源
- GitHub 上的项目:https://github.com/ErichStyger/mcuoneclipse/tree/master/Examples/MCUXpresso/LPC55S69-EVK/LPC55S69_AdafruitLCD
- Adafruit 2.8″ TFT 触摸护罩,适用于 Arduino,带电阻式触摸屏:https://www.adafruit.com/product/1651
- Adafruit 2.8″ TFT 触摸护罩,带电容式触摸屏的 Arduino:https://www.adafruit.com/product/1947
- 阿达果 2.4 羽毛翼: https://www.adafruit.com/product/3315
0.1