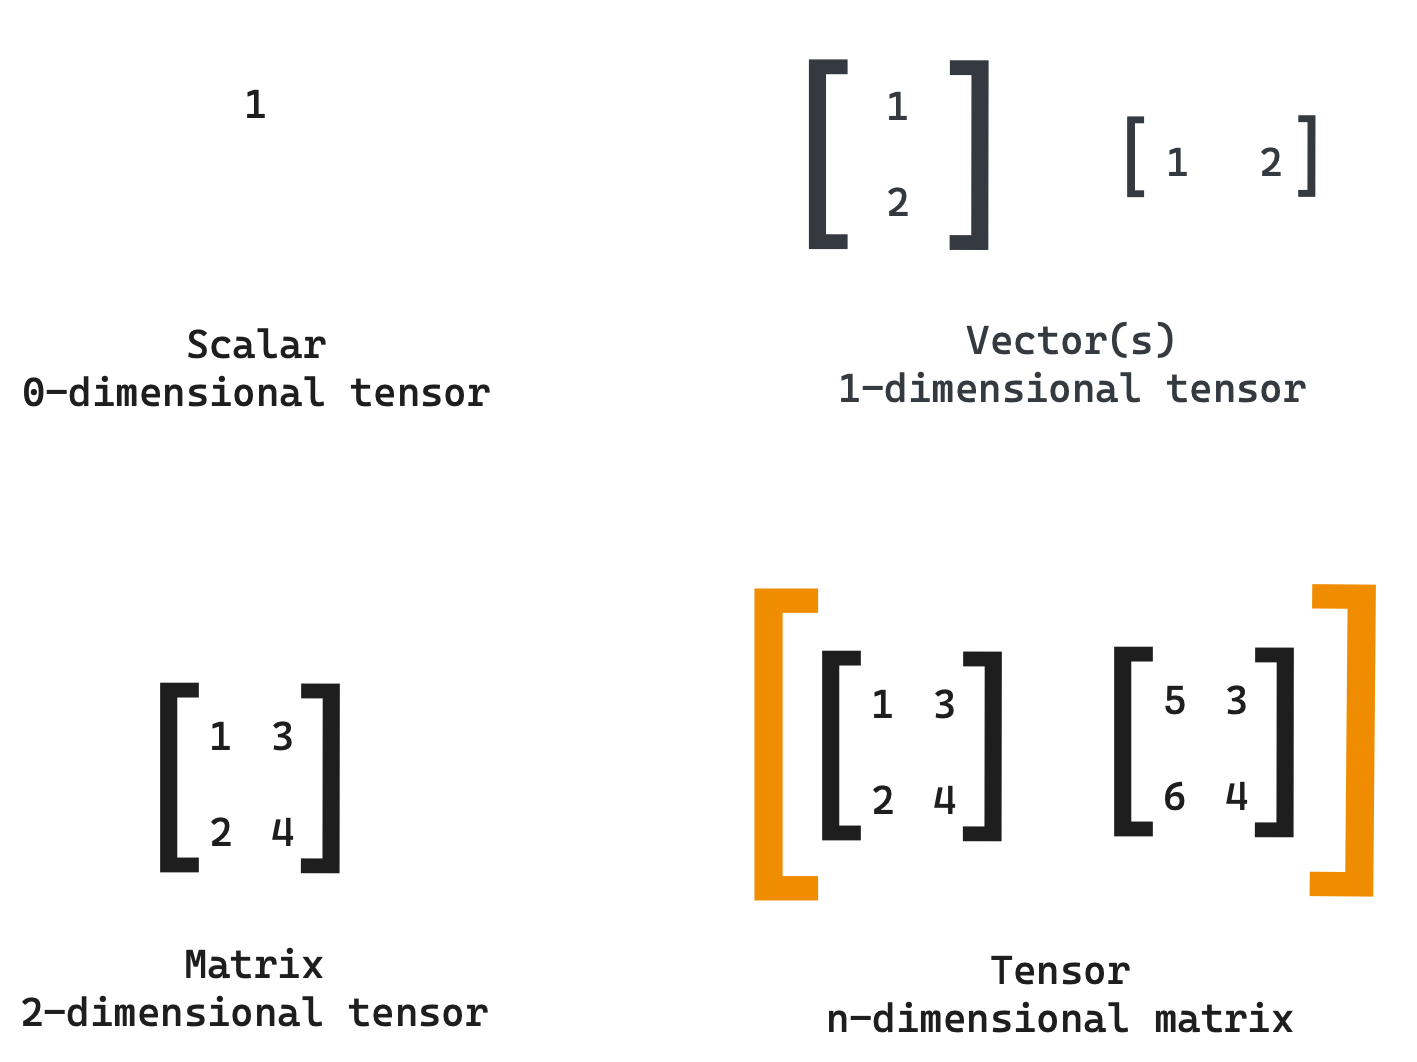
你好!
在这里,我们将模拟一些向量场(例如,电磁场)在N-d空间。
我们的计划是:
- 定义我们的理论基础(如numpy中的数组 )。
- 定义点粒子和相互作用场的机制。
- 可视化电场。
- 可视化粒子在电磁场中的运动。
您也可以喜欢:基于矢量的语言。
理论基础
向量
任何物理场景的基本元素是矢量。我们需要什么?对矢量、距离、模块和几个技术事物的算术运算。我们将从List继承的矢量。这是其初始化的外观:
class Vector(list):
    def __init__(self, *el):
        for e in el:
            self.append(e)
现在,我们可以创建一个矢量
v = Vector(1, 2, 3)让我们设置算术运算加法:
class Vector(list):
...
    def __add__(self, other):
        if type(other) is Vector:
            assert len(self) == len(other), "Error 0"
            r = Vector()
            for i in range(len(self)):
                r.append(self[i] + other[i])
            return r
        else:
            other = Vector.emptyvec(lens=len(self), n=other)
            return self + other
结果:
v1 = Vector(1, 2, 3)
v2 = Vector(2, 57, 23.2)
v1 + v2
>>> [3, 59, 26.2]
我们同样定义所有的算术运算(向量的完整代码在末尾)。现在,我们需要一个距离函数。我可以简单地使 dist (v1, v2) – 但这不是美丽的,所以我们将重新定义 % 运算符:
class Vector(list):
...
    def __mod__(self, other):
        return sum((self - other) ** 2) ** 0.5
结果:
v1 = Vector(1, 2, 3)
v2 = Vector(2, 57, 23.2)
v1 % v2
>>> 58.60068258988115我们还需要几种方法来加快矢量生成和美观的输出。这里没有什么棘手的,所以这里是Vector类的整个代码。
粒子
在这里,在理论上,一切都很简单 – 点有坐标,速度和加速度。此外,它还具有质量和一组自定义参数(例如,对于电磁场,您可以设置电荷)。
初始化如下:
class Point:
    def __init__(self, coords, mass=1.0, q=1.0 speed=None, **properties):
        self.coords = coords
        if speed is None:
            self.speed = Vector(*[0 for i in range(len(coords))])
        else:
            self.speed = speed
        self.acc = Vector(*[0 for i in range(len(coords))])
        self.mass = mass
        self.__params__ = ["coords", "speed", "acc", "q"] + list(properties.keys())
        self.q = q
        for prop in properties:
            setattr(self, prop, properties[prop])
为了移动、固定和加速我们的观点,我们将编写以下方法:
class Point:
.
def 移动(自我,dt):
自我.coords = 自我.coords = 自我.速度 = dt
def 加速(自我,dt):
自我.速度 = 自我.速度 = 自我.acc = dt
德加速(自我,力): = 考虑施加力,点获得加速度
自我.acc = 自我.acc = 力 / 自我质量
def clean_acc(自我):
self.acc = self.acc = 0
做得好,点本身就完成了。
点的代码。
交互字段
我们称相互作用场为一个物体,它包括一组来自太空的所有粒子,并施加力。我们将考虑我们宇宙的一个特例,所以我们将有一个自定义交互(当然,这是很容易扩展)。声明构造函数并添加点:
class InteractionField:
    def __init__(self, F):  # F - is a custom force, F(p1, p2, r), p1, p2 - points, r - distance inbetween
        self.points = []
        self.F = F

    def append(self, *args, **kwargs):
        self.points.append(Point(*args, **kwargs))
现在,有趣的部分是声明一个函数,该函数此时返回”张力”。虽然这个概念指的是电磁相互作用,但在我们的例子中,它是一些抽象的向量,我们将沿着它移动点。在这种情况下,我们将具有点 q 的属性,在特定情况下 – 点的电荷(一般来说 – 任何我们想要的,甚至向量)。那么,C点的张力是什么?类似内容: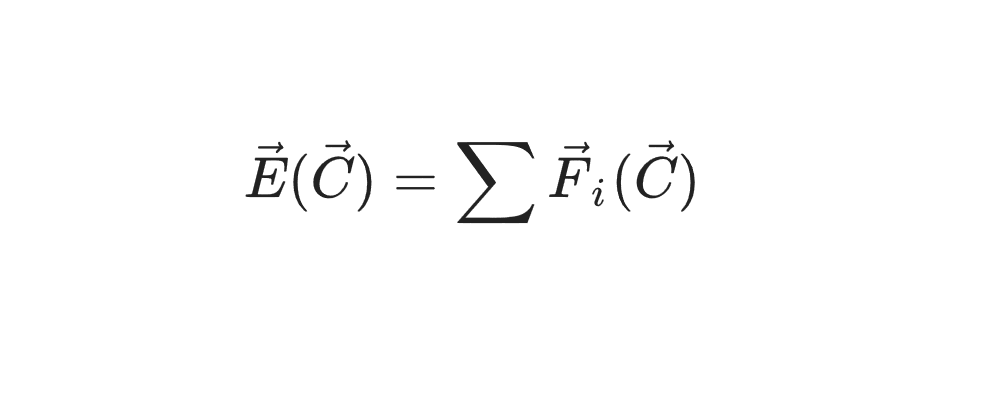
点 C 中的电强度等于作用于某些单位点的所有材料点的力之和。
class InteractionField:
...
    def intensity(self, coord):
        proj = Vector(*[0 for i in range(coord.dim())])
        single_point = Point(Vector(), mass=1.0, q=1.0)  # That's our "Single point"
        for p in self.points:
            if coord % p.coords < 10 ** (-10):  # Check whether we compare coord with a point P where P.coords = coord
                continue
            d = p.coords % coord
            fmod = self.F(single_point, p, d) * (-1)
            proj = proj + (coord - p.coords) / d * fmod
        return proj
此时,您已经可以可视化矢量字段,但我们将在末尾执行。现在,让我们在互动中迈出一步。
class InteractionField:
...
    def step(self, dt):
        self.clean_acc()
        for p in self.points:
            p.accinc(self.intensity(p.coords) * p.q)
            p.accelerate(dt)
            p.move(dt)
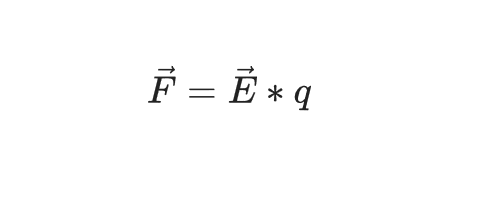
对于每个点,我们确定这些坐标的强度,然后确定此粒子的最终力:
粒子运动和矢量场可视化
我们终于到达了最有趣的部分。让我们从…
模拟电磁场中粒子的运动
u = InteractionField(lambda p1, p2, r: 300000 * -p1q / (r = 2 = 0.1))
i 在范围 (3):
u.app(Vector.randvec(2) = 10,q=随机.随机() – 0.5)
实际上,系数 k 应等于某种数十亿(9 = 10 = (- 9),但由于它将在 t -> 0 时淬火,因此更容易使两者都成为正数。因此,在我们的物理 k = 300,000。
接下来,我们沿每个轴添加 10 个点(二维空间),坐标从 0 到 10。此外,我们给每一点从 -0.25 到 0.25 的电荷。然后,我们运行一个循环,并根据它们的坐标(和轨迹)绘制点:
X, Y = [], []
for i in range(130):
    u.step(0.0006)
    xd, yd = zip(*u.gather_coords())
    X.extend(xd)
    Y.extend(yd)
plt.figure(figsize=[8, 8])
plt.scatter(X, Y)
plt.scatter(*zip(*u.gather_coords()), color="orange")
plt.show()
应该发生的情况是:
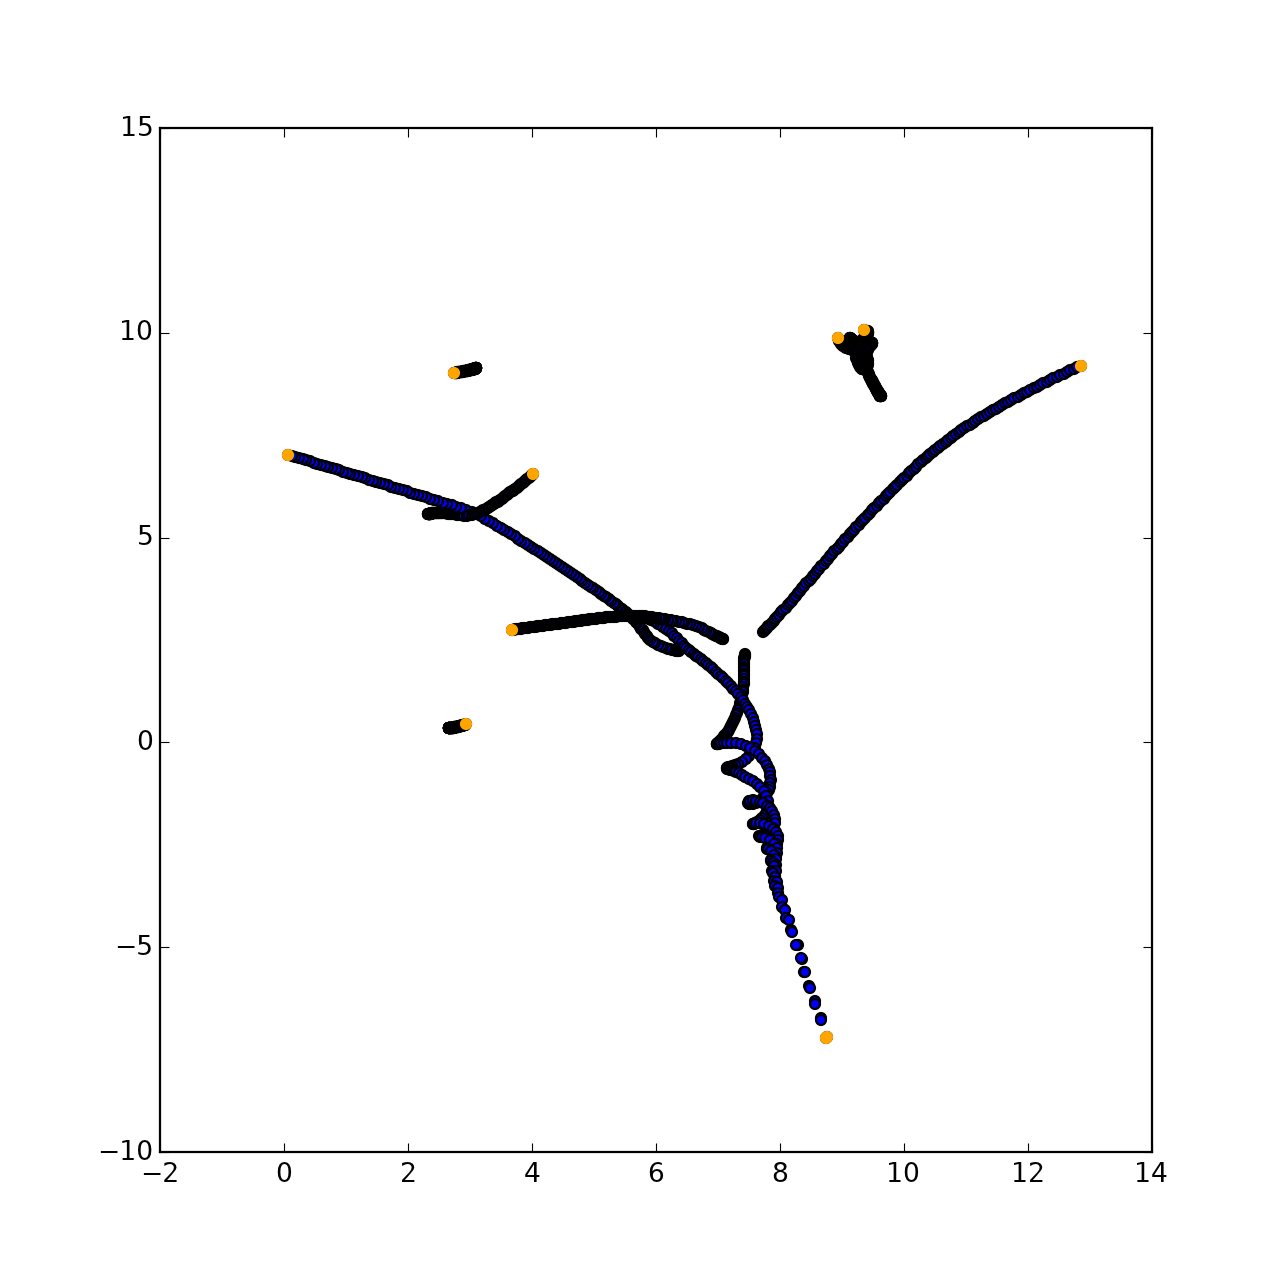
事实上,绘图将是完全随机的,因为每个点的轨迹当前(2019年)是不可预测的。
矢量字段可视化
我们需要通过一个步骤来遍过坐标,并在每个坐标中按正确的方向绘制一个矢量。
fig = plt.figure(figsize=[5, 5])
res = []
STEP = 0.3
for x in np.arange(0, 10, STEP):
    for y in np.arange(0, 10, STEP):
        inten = u.intensity(Vector(x, y))
        F = inten.mod()
        inten /= inten.mod() * 4  # длина нашей палочки фиксирована
        res.append(([x - inten[0] / 2, x + inten[0] / 2], [y - inten[1] / 2, y + inten[1] / 2], F))
for r in res:
    plt.plot(r[0], r[1], color=(sigm(r[2]), 0.1, 0.8 * (1 - sigm(r[2])))) # Цвет по хитрой формуле чтобы добиться градиента

plt.show()
你应该得到这样的事情: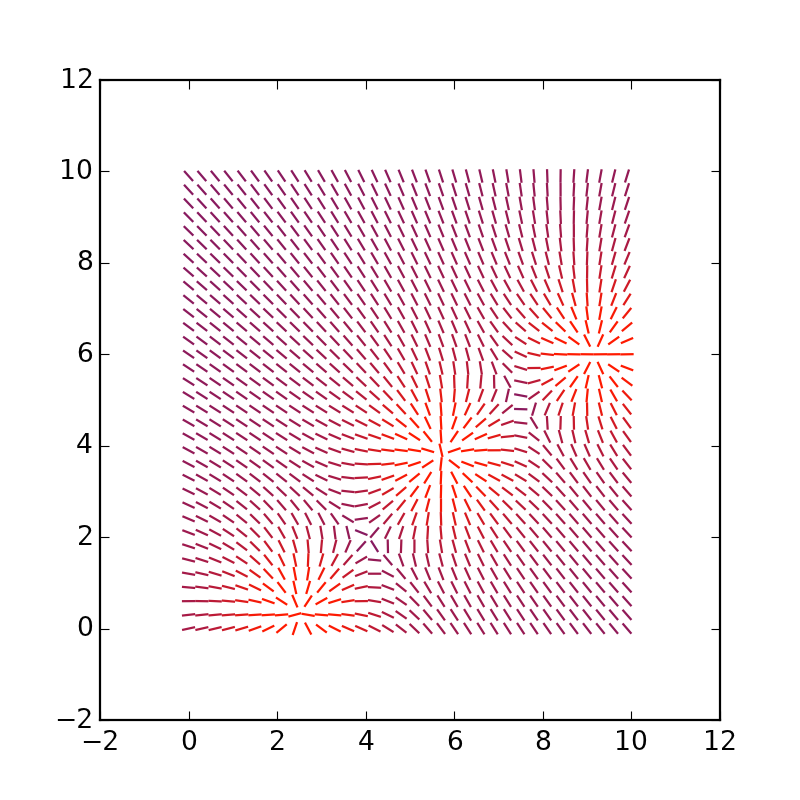
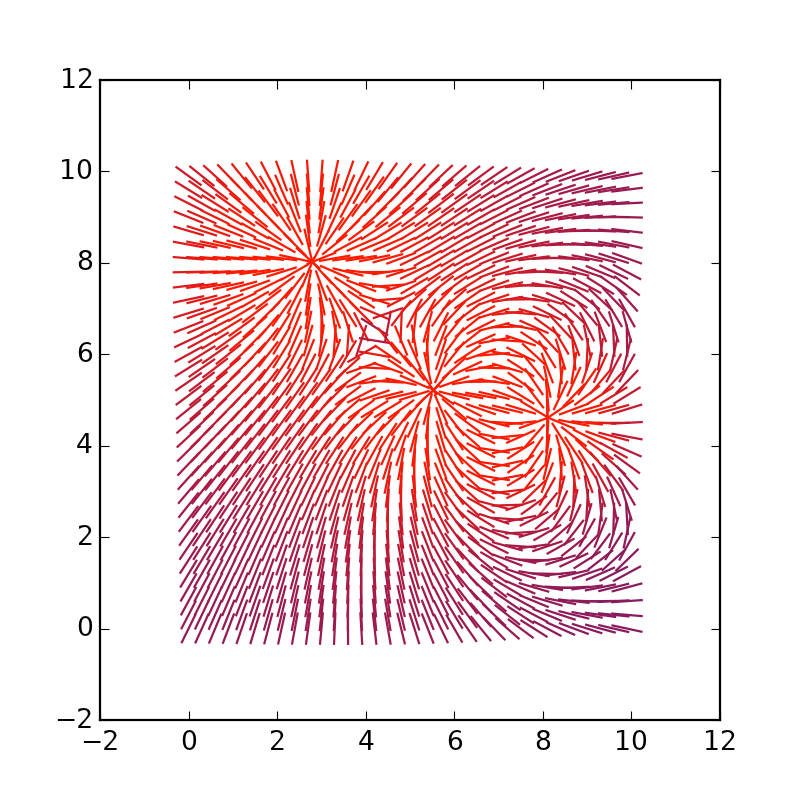
您可以延长矢量本身,将 = 4 替换为 = 1.5:
改变维度
让我们创建一个包含 200 个点的五维空间,以及一个不依赖于距离的平方,而是取决于第 4 度的交互。
u = InteractionField(lambda p1, p2, r: 300000 * -p1.q * p2.q / (r ** 4 + 0.1))
for i in range(200):
    u.append(Vector.randvec(5) * 10, q=random.random() - 0.5)
现在,所有坐标、速度等都定义了五个维度。现在,让我们对一些内容进行建模:
velmod = 0
velocities = []
for i in range(100):
    u.step(0.0005)
    velmod = sum([p.speed.mod() for p in u.points])   # Adding sum of modules of all the velocities
    velocities.append(velmod)
plt.plot(velocities)
plt.show()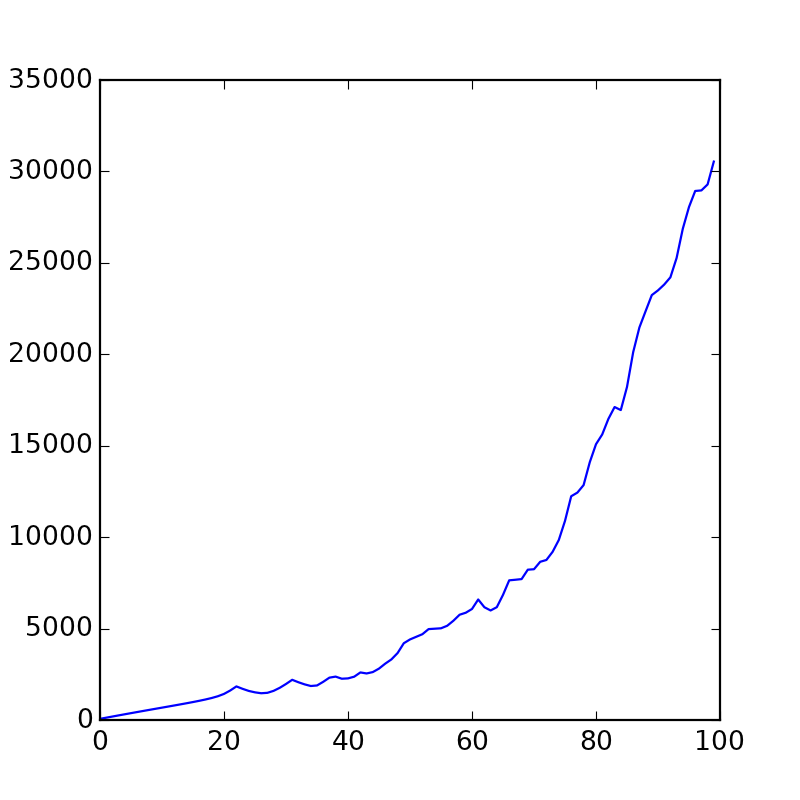
这是任何给定时间所有速度的总和的图表
嗯,这是一个简短的指导,如何简单地模拟基本的物理的东西,谢谢你的关注。
交互字段。
点。
矢量.


