介绍
在 Android 编程中,活动对象用于向用户显示信息,而”意图”对象用于在活动之间导航。在 Xamarin.Forms 中,我们将熟悉与活动类似的页面和类似于意向对象的导航页面对象。
页面
在前面的帖子中,我们浏览了Xamarin中布局和视图的基础知识。在现实世界中,移动应用程序由多个页面组成。
Xamarin.Forms 提供了许多页面对象,我们可用于设置应用程序的 UI,并且所有这些对象都派生自 abto Page类。下表描述了 Xamarin.Forms 中的可用页面:
|
页面类型 |
描述 |
|
内容页面 |
显示单个视图对象 |
|
选项卡页 |
使用选项卡在子页面之间促进导航 |
|
轮播页 |
在子页面之间使用轻扫手势以方便使用 |
|
母版详细信息页面 |
管理两个单独的窗格,其中包括一个弹出窗口控件 |
|
导航页 |
提供用于在页面之间导航的基础结构 |
我们可以通过三种方式创建页面对象:
- 使用 XAML
- 使用 C# 代码
- 使用项目模板由可视化工作室提供
为了遵循本文中的示例,我们还创建了一个新的Xamarin.Forms应用程序,名为NavigApp。
内容页
ContentPage是最简单的页面对象,允许显示单个可视元素(或上一篇文章中的控件)。默认情况下,当我们成功创建NavigApp应用程序时,MainPage.xaml 文件的内容可以如下所示:
<?xml version="1.0" encoding="utf-8" ?>
<ContentPage xmlns="http://xamarin.com/schemas/2014/forms"
             xmlns:x="http://schemas.microsoft.com/winfx/2009/xaml"
             xmlns:local="clr-namespace:NavigApp"
             x:Class="NavigApp.MainPage">
       <Label Text="Welcome to Xamarin.Forms!"
           VerticalOptions="Center"
           HorizontalOptions="Center" />
</ContentPage>
在上面的 XAML 代码中,可以使用<ContentPage>元素及其属性创建ContentPage对象。此ContentPage对象显示单个可视元素”标签”元素。代码落后文件 (MainPage.xaml.cs):
namespace NavigApp
{
       public partial class MainPage : ContentPage
       {
              public  MainPage()
              {
                     InitializeComponent();
              }
       }
}我们还可以使用项目模板创建ContentPage:
- 右键单击解决方案资源管理器窗口中的NavigApp项目,然后选择”添加>新项目…
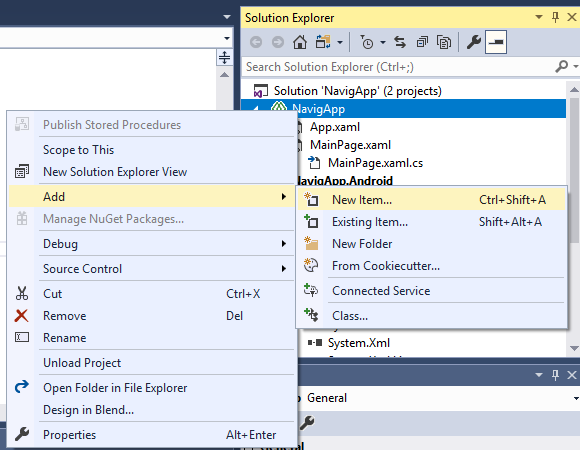
- 接下来,选择选项并在”添加新项目”对话框中填写内容,作为以下屏幕截图:
请注意,我们可以选择内容页项(XAML 模板)或内容页 (C#)项 (C#)项,即 C# 代码模板。内容页面可以单独使用,也可以用作其他页面的内容(稍后将看到)。
母版详细信息页面
MasterDetailPage允许我们将内容拆分为两个相关部分:显示项的主部件和显示主部件上项目详细信息的明细部分。以下 XAML代码(MainPage.xaml文件)将演示如何创建母版详细信息页面对象,其主控部分和详细信息部分均由 ContentPage 对象表示:
<?xml version="1.0" encoding="utf-8" ?>
<MasterDetailPage xmlns="http://xamarin.com/schemas/2014/forms"
             xmlns:x="http://schemas.microsoft.com/winfx/2009/xaml"
             xmlns:local="clr-namespace:NavigApp"
             x:Class="NavigApp.MainPage" >
    <MasterDetailPage.Master>
        <ContentPage Title="Content Page">
            <Label Text="This is the Master" HorizontalOptions="Center"
                VerticalOptions="Center"/>
        </ContentPage>
    </MasterDetailPage.Master>
    <MasterDetailPage.Detail>
        <ContentPage>
            <Label Text="This is the Details" HorizontalOptions="Center"
                VerticalOptions="Center"/>
         </ContentPage>
    </MasterDetailPage.Detail>
</MasterDetailPage>请注意,我们必须插入<Master 详细信息页面的 Title属性。”主控”> 是<ContentPage>元素。代码隐藏文件的内容 (MainPage.xaml.cs )将如下所示:
namespace NavigApp
{
       public partial class MainPage : MasterDetailPage
    {
              public  MainPage()
              {
                     InitializeComponent();
              }
       }
}
结果:
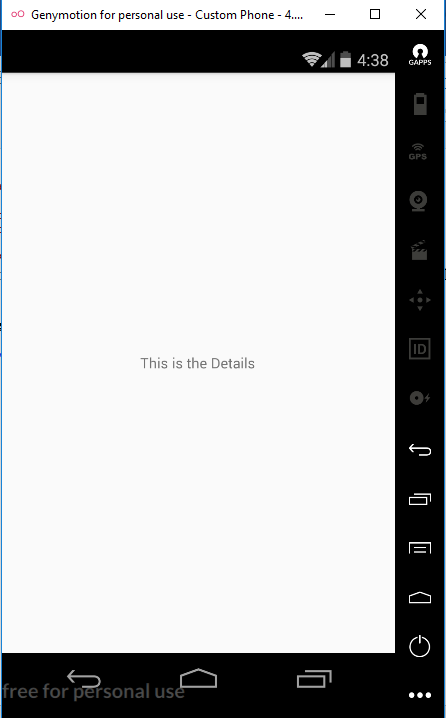
您可以从左侧轻扫以启用主弹出窗口:
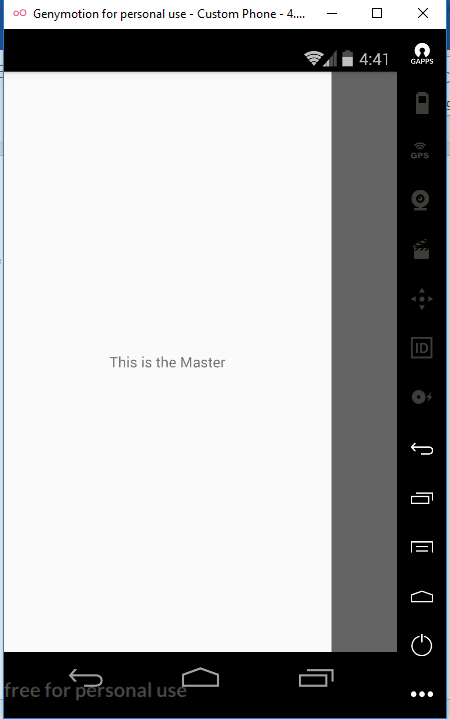
并刷回隐藏它。来自 Microsoft 文档的重要说明:
“母版详细信息页的母版页应始终是 ContentPage 实例,并且详细信息页应仅填充 TabbedPage、导航页和内容页实例。这将有助于确保跨所有平台的一致用户体验。
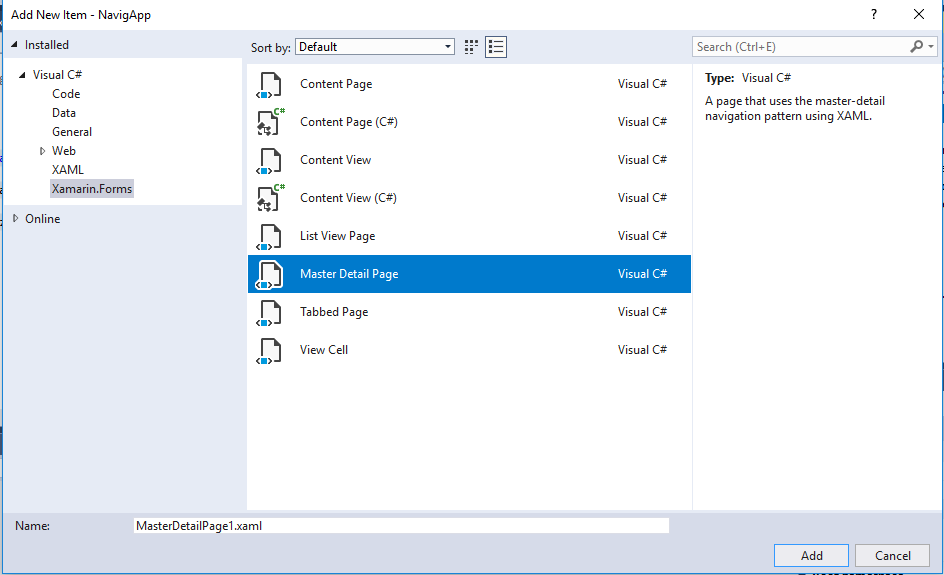
您还可以通过从VisualStudio添加项目模板来添加母版详细信息页面对象:
选项卡页
TabbedPage 对象用于需要按主题或活动类型对多个页面进行分类的情况。您可以将多个 ContentPage 对象分组到选项卡中,作为以下 XAML 代码 (MainPage.xaml):
<?xml version="1.0" encoding="utf-8" ?>
<TabbedPage xmlns="http://xamarin.com/schemas/2014/forms"
             xmlns:x="http://schemas.microsoft.com/winfx/2009/xaml"
             xmlns:local="clr-namespace:NavigApp"
             x:Class="NavigApp
儿童>
<内容页标题=”第一个”>
<标签文本=”这是第一页”水平选项””中心”垂直选项=”中心”/>
</内容页面>
<内容页标题=”秒”>
<标签文本=”这是第二页”水平选项””中心”垂直选项=”中心”/>
</内容页面>
<内容页标题=”第三”>
<标签文本=”这是第三页”水平选项”=”中心”垂直选项=”中心”/>
</内容页面>
</TabbedPage.儿童>
</TabbedPage>
代码后面(MainPage.xaml.cs)可有可有:
namespace NavigApp
{
       public partial class MainPage : TabbedPage
    {
              public  MainPage()
              {
                     InitializeComponent();
        }
       }
}
结果如下所示:
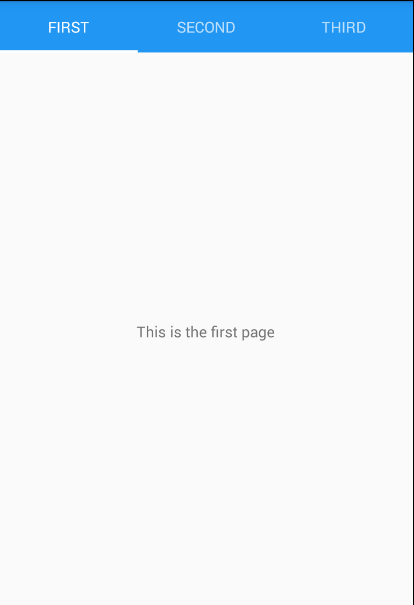
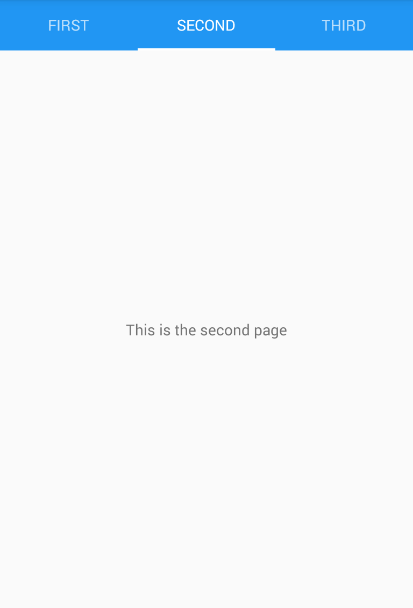
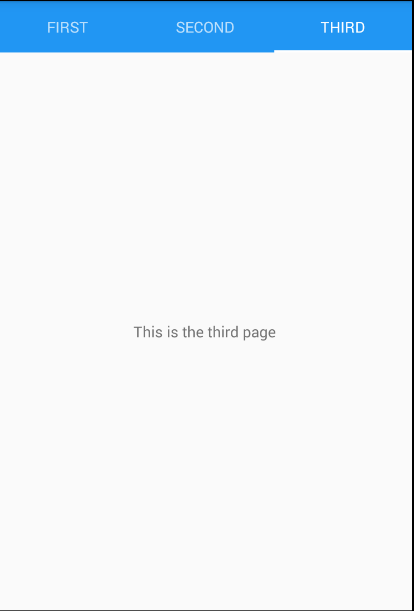
如您所见,我们将多个 ContentPage 对象组织到 TabbedPage.子集合中,我们还必须为每个 ContentPage 提供一个标题(即每个选项卡的标题)。
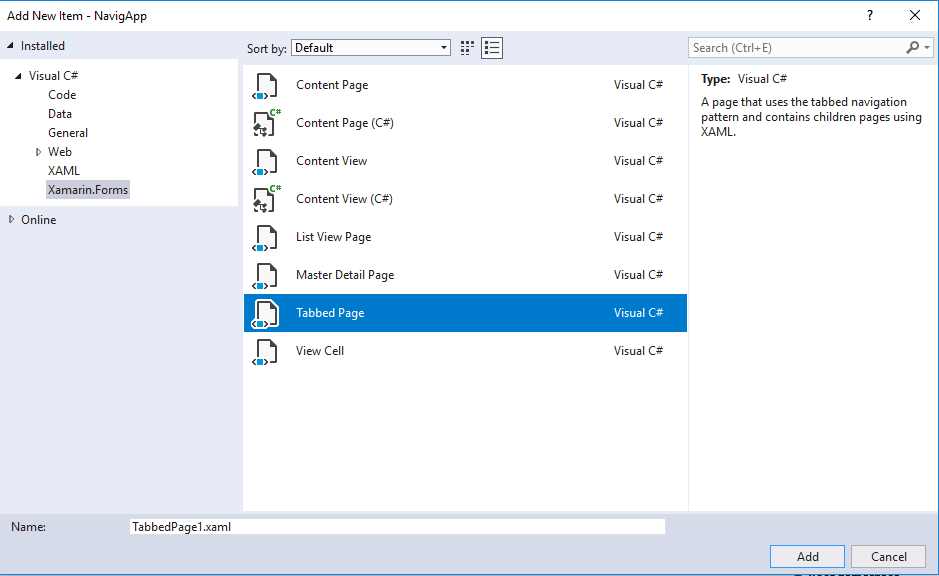
我们还可以通过从 Visual Studio 添加项目模板来添加 TabbedPage 对象:
转盘页
轮播页类似于TabbedPage,但我们可以使用轻扫手势在子页面之间切换,而不是具有选项卡。以下 XAML 代码将使用轮播页演示图片库:
<?xml version="1.0" encoding="utf-8" ?>
<CarouselPage xmlns="http://xamarin.com/schemas/2014/forms"
             xmlns:x="http://schemas.microsoft.com/winfx/2009/xaml"
             xmlns:local="clr-namespace:NavigApp"
             x:Class="NavigApp.MainPage" >
    <CarouselPage.Children>
        <ContentPage Title="First">
            <Image Source="cat.jpg" HorizontalOptions="Center" VerticalOptions="Center"/>
        </ContentPage>
        <ContentPage Title="Second">
            <Image Source="dog.jpg" HorizontalOptions="Center" VerticalOptions="Center"/>
        </ContentPage>
        <ContentPage Title="Third">
            <Image Source="mouse.jpg" HorizontalOptions="Center" VerticalOptions="Center"/>
        </ContentPage>
    </CarouselPage.Children>
</CarouselPage>
和代码后面,分别:
namespace NavigApp
{
       public partial class MainPage : CarouselPage
    {
              public  MainPage()
              {
             InitializeComponent();
        }
       }
}
结果:

轻扫至第二页:

第三页:

请注意,我们必须将图片导入 Android 项目中的”资源>可绘制”文件夹:
在页面之间导航
理论上,要从一个页面移动到另一个页面,应用程序会将新页面推送到导航堆栈,该页面将成为活动页,并返回到上一页,应用程序将从导航堆栈中弹出当前页面。我们可以在导航过程中将数据从页面传递到另一个页面。
实际上,导航包括以下运算符:
- 创建根页(即第一页)通过使用navigationPage对象添加到导航堆栈中,App.xaml.cs文件中。
- 通过将此页面推送到导航堆栈,导航到下一页。我们可以在当前页面的导航属性上使用PushAsync或PushModalAsync等方法。
- 默认情况下,我们可以使用设备上的”后退”按钮将导航回上一页,但我们可以通过使用导航属性上的PopAsync或PopModalAsync进行编程,以便从导航堆栈中弹出活动页面。
- 在浏览页面构造函数或BindingContext时传递数据。
在我们的NavigApp应用程序中,假设 NagvigApp 应用程序具有 MainPage.xaml,如下所示:
<?xml version="1.0" encoding="utf-8" ?>
<ContentPage xmlns="http://xamarin.com/schemas/2014/forms"
             xmlns:x="http://schemas.microsoft.com/winfx/2009/xaml"
             xmlns:local="clr-namespace:NavigApp"
             x:Class="NavigApp.MainPage"
             Title="Main Page">
    <StackLayout>
    <Label Text="I am Main Page" HorizontalOptions="Center"
VerticalOptions="Center"/>
        <Button Text="Next Page" HorizontalOptions="Center" VerticalOptions="Center"
Clicked="nextPage"/>
    </StackLayout>
</ContentPage>
MainPage.xaml.cs:
namespace NavigApp
{
       public partial class MainPage : ContentPage
    {
       public  MainPage()
       {
             InitializeComponent();
        }
        private void nextPage(object sender, EventArgs e)
        {
        }
    }
}下一个页面方法是单击下一页的事件处理程序。如果运行NavigApp,则结果如下所示:
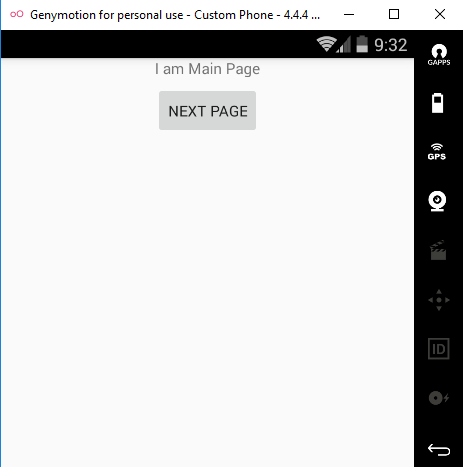
我们可以将 MainPage 推送到导航堆栈,否则 MainPage 将成为根页,通过修改App.xaml.cs文件中应用类的构造函数应用:
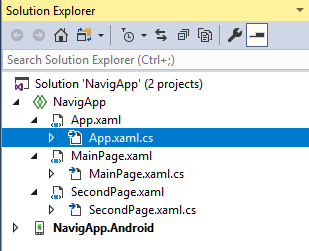
namespace NavigApp
{
       public partial class App : Application
       {
              public App ()
              {
                     InitializeComponent();
                     //MainPage = new NavigApp.MainPage();
                     MainPage = new NavigationPage(new MainPage());
              }
...
}
如果现在运行该应用程序,结果将如下所示:
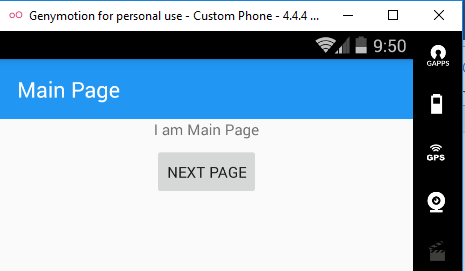
显示标题的主页页面顶部有一个导航栏。接下来,我们将向项目添加名为”第二页”的第二页:
第二页.xaml:
<?xml version="1.0" encoding="utf-8" ?>
<ContentPage xmlns="http://xamarin.com/schemas/2014/forms"
             xmlns:x="http://schemas.microsoft.com/winfx/2009/xaml"
             x:Class="NavigApp.SecondPage"
             Title="Second Page">
    <ContentPage.Content>
        <StackLayout>
            <Label Text="Welcome to second page!"
                VerticalOptions="CenterAndExpand"
                HorizontalOptions="CenterAndExpand" />
            <Button Text="Previous Page"
                VerticalOptions="CenterAndExpand"
                HorizontalOptions="CenterAndExpand"
                    Clicked="prevPage"/>
        </StackLayout>
    </ContentPage.Content>
</ContentPage>SecondPage.xaml.cs:
namespace NavigApp
{
       [XamlCompilation(XamlCompilationOptions.Compile)]
       public partial class SecondPage : ContentPage
       {
              public SecondPage ()
              {
                     InitializeComponent ();
              }
              private void prevPage(object sender, EventArgs e)
              {
              }
       }
}要通过单击”下一页”按钮从主页页面移动到第二页页面,我们必须将第二页页面推送到导航堆栈。在下一个Page方法中,我们写一些东西:
async private void nextPage(object sender, EventArgs e)
     {
         await Navigation.PushAsync(new SecondPage());
}请注意,我们必须将异步关键字添加到下一个Page方法的声明。现在,我们可以再次运行应用程序,然后单击”下一页”按钮,应用程序将导航到第二页页面:
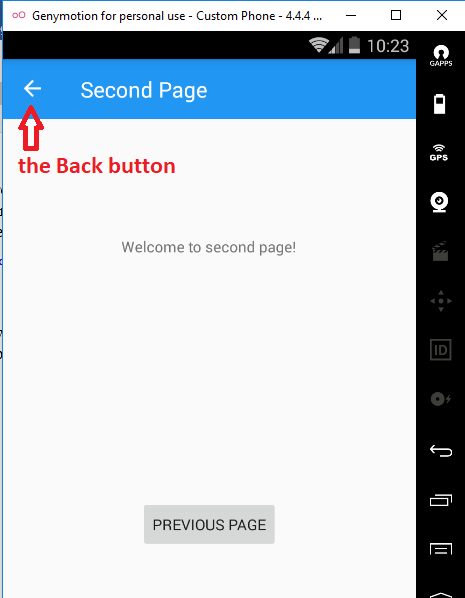
我们可以通过单击”后退”按钮导航回主页页面,但是,您可以通过对前vPage方法(即”前一页”按钮的Click事件处理程序)进行一些更改来执行此操作:
async private void prevPage(object sender, EventArgs e)
   {
            await Navigation.PopAsync();
   }
导航时,我们可以通过页面构造函数参数将数据传递到 MainPage 页面,该参数显示以下更改:
- 在 App() 构造函数中:向导航页构造函数添加参数
public App ()
{
    InitializeComponent();
MainPage = new NavigationPage(new MainPage("Minh"));
}<ContentPage ...>
<StackLayout>
<Label x:Name="name" Text="I am " HorizontalOptions="Center"
VerticalOptions="Center"/>
<Button .../>
</StackLayout>
</ContentPage>- 在MainPage.xaml.cs:向 MainPage 构造函数添加一些代码:
public  MainPage(string name)
       {
            InitializeComponent();
            var lbName = this.FindByName<Label>("name");
            lbName.Text += name;
        }
结果:
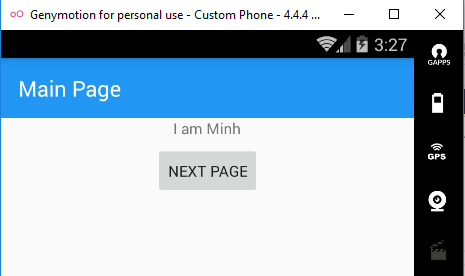
我们还可以通过BindingContext将数据传递到 MainPage 页面,这将在下一篇文章中发现。
结论
在本文中,我介绍了 Xamarin 中的页面和导航我还介绍了如何使用 page 构造函数参数导航时传递数据。你可以通过查看微软文档来了解有关所有这些文档的更多情况。
